CLICK HERE FOR FREE BLOGGER TEMPLATES, LINK BUTTONS AND MORE! »
Showing posts with label Add-On. Show all posts

Friday, March 30, 2012

Creative Endeavors

Even amidst the depression and anxiety I was able to get a couple of creative projects done for Sketch Support. Yay!

February Card Sketch

First off, at the beginning of February was card week. I loved the sketch and thought that it would make the perfect Valentine's Day Card. My goal was to make 16 of them! A little crazy? I would say so! Especially considering my mental state. I only completed two of them, but I plan on turning the others into thank you cards.

February Card

"Happy Valentine's Day" card
Supplies - Cardstock: Bazzill; Patterned Paper: BoBunny; Ink: Colorbox Fluid Chalk Ink and Staz On; Corner Rounder: We R Memory Keepers; Stamp: craft smart; Floss: DMC

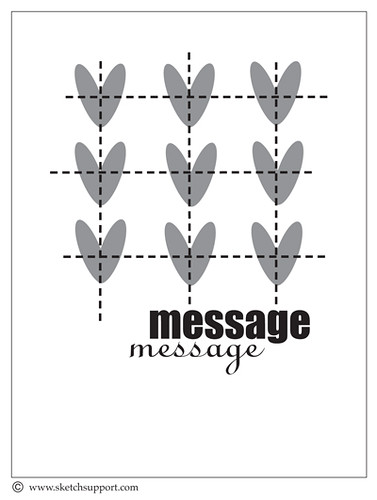
A couple of weeks later was Add-On week. That sketch caught my eye as well and my creative mind started turning.
Februarty Add-On Sketch

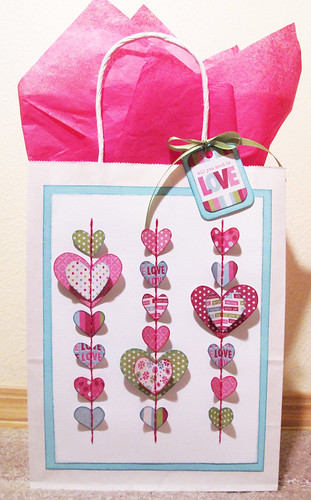
It is very similar to the card sketch and I love to handstitich. I knew that this would look great on a gift bag and so I got to work. I love how it turned out and actually found the energy to make two!

February Add-On

"All You Need is Love" gift bag
Supplies - Cardstock: Bazzill; Patterned Paper: We R Memory Keepers; Ink: Colorbox Fluid Chalk Ink; Corner Rounder: We R Memory Keepers; Floss: DMC; Tissue Paper: Hallmark; Hearts: Cricut; Other: Gift Bag

Wednesday, November 30, 2011

Gobble Gobble

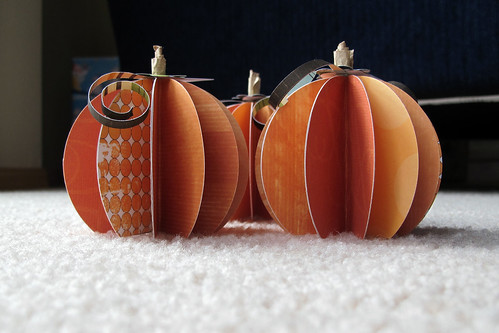
Last year was the first year that I made place cards for our Thanksgiving table. I made these pumpkins for each person. They took me quite awhile to finish them even with help. I was thinking that we would just reuse them this year since the end of November was quite busy but of course I just had to add more to my plate. :o)

Pumpkin Placecards

November Add-On Sketch

Two weeks ago it was an add-on sketch over at Sketch Support. The sketch is of a leaf but I was having a hard time figuring out how to use it. I guess my mom suggested that I turn it into a turkey feather though somehow I didn't hear her. A few minutes later I thought it would make the perfect turkey feather.

Turkey

"Turkey"
Supplies - Cardstock: Bazzill; Patterned paper: We R Memory Keepers; Chalk Ink: ColorBox; Tools: Cricut (Simply Charmed); Scoring Board: Martha Stewart; Pearls: Queen & Company

I ended up making ten of these turkeys. I actually finished them just minutes before we sat down to eat our Thanksgiving meal. I used black letter stickers to add names to the fronts of the turkeys. They turned out quite cute! I've been told that I need to make either pilgrims or Indians for next year. We shall see.

Wednesday, August 17, 2011

Ad-On Sketch @ Sketch Support


I am loving this month's ad-on sketch over @ Sketch Support! It seems fitting since my birthday is at the end of this month. :) I decided to think outside the box and make a party hat! I found a template here by jones design company. They also give a nice tutorial. Here is my take:


"Party Hat"
Supply List - Patterned Paper: DCWV; Ink: ColorBox Chalk Ink; Distressing Tool: Making Memories; Pop Dots: EK Success; Party Hat Template: jones design company; Other: Staples, Glue Gun

Thursday, July 21, 2011

God Bless America

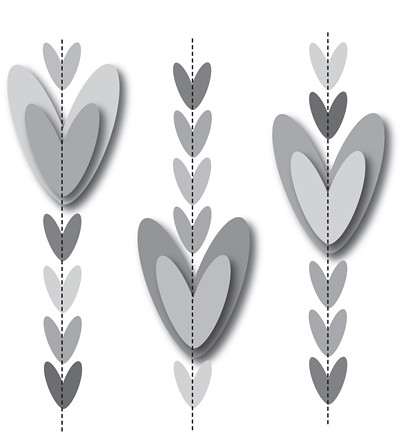
There is a fun Add-On Sketch over at the Sketch Support website this week! This add-on sketch is intended to look like fireworks exploding in the sky, but could be altered into a number of different things.

Here is the sketch (go to the website to print it out):


For this sketch I kept trying to think outside the box but wasn't very successful. I originally was going to alter the fireworks to look like dandelions. It would have worked great except that I was using dandelion patterned paper on my layout and it just wasn't working for me. I'm sure my perfectionism was coming out in full force. ;)

Instead of dandelions I went with firecrackers! I don't have too many holiday decorations, so I thought that I would make myself a 4th of July decoration. Here is what I came up with:


I decorated the back of an 8x10 canvas. I did this once before for another design team and had so much fun with it. I painted both the front and the back of the canvas and then glued down all the different parts. I stuck to the firework sketch for the most part with a few variations. I love how the sketch is very detailed about how to stitch the sparklers. Worked perfectly for me and I used metallic DMC floss to make sure that they really did sparkle. :)

Variation #1 -  I added rectangle bases to my fireworks. They add some visual interest and ground the sparklers. So I guess now they are considered firecrackers instead of fireworks.
Variation #2 - Instead of stitching the firework stems I used aluminum wire. I stuck the wire into the pop dots under the rectangle bases and then cushioned the other end between two small pop dots that are covered by the center circles.